

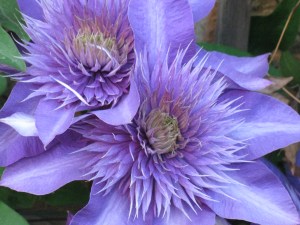
Photo by: Kimberley Pacholko
There are few flowering vines that command as much visual appeal as do Clematis. Many varieties offer near diner plate size blooms on plants that can bloom for weeks on end. Growing these amazing Clematis vines naturally, without the aid of chemicals is not only do-able but from the plants point of view preferable.
For big beautiful blooms on healthy low maintenance Clematis plants try these all natural gardening tips:
- The first rule of thumb for growing healthy Clematis plants naturally is to select varieties that are disease and insect resistant and well suited to both your grow zone and your natural soil type. Try to purchase varieties that are noted for being resistant to ‘Clematis Wilt’. Other ways to protect your plants against this fungal attack (that can cause your plants to suddenly and severely wilt) is to ensure that the vines are securely attached to their growing structure. These delicate vines are easily damaged by wind or miss handling and the resulting wounds provide a target for a wide range of fungi to attack. Also ensure that all pruning tools are clean and sharp. If ‘Clematis Wilt’ does strike, immediately prune off all affected areas. Then to prevent spreading the disease, clean your pruning tools with a mild solution of bleach and water or wipe with a cotton ball soaked in rubbing alcohol
- Choose the site: Clematis require about 6 hours of full sun per day to perform their best (although, light shading during the hottest part of the day is beneficial). A few of the very large, flowered varieties should be planted in a more easterly exposure to prevent excessive flower fading caused by too much sun (Clematis ‘Bees Jubilee’ is a good example of this, to much sun and its flowers will bleach to an almost white).
- Preparing the soil: Clematis prefers a rich loamy soil, high in organic content with a pH close to neutral (6.6-7.0). Add lime to an acid soil to alkalize it and add elemental sulphur to an overly alkaline soil to acidify it. Add generous amounts of compost to the soil at time of planting and continue to top dress with compost yearly. Do not underestimate the importance of creating a healthy growing medium. Without it you will constantly struggle with poorly performing plants, insect attacks, disease, poor flowering and your plants will require more frequent watering.
- Watering practices: Clematis prefer to be kept moist at all times (especially when in flower) so be sure to locate your Clematis in an area that is accessible for watering. To ensure a healthy, strong root development, water your clematis deeply rather than only surface watering. Many people, like to grow Clematis on trellises attached to the house. This location however will create a more demanding water schedule for you as the roof overhang shelters the plant from much of the natural rainwater. Providing a heavy mulch for your Clematis is an easy and effective way to reduce watering requirements while at the same time providing soil enriching organic content.
- Practice proper pruning techniques: When to prune your Clematis will depend upon the variety you have selected. Basically there are 3 types or groups of Clematis. When and how to prune will depend upon which group it belongs to.
- Group 1: This group contains some of the most vigorous clematis. Although this group does not require pruning (other than to remove deadwood), you may wish to prune in order to control its size. Any pruning should be completed as soon as flowering has finished.
- Group 2: This group contains the early and mid-season large, flowered hybrids which usually begin flowering before the end of June. The only pruning usually required in this group is to prune out dead wood in late winter/early spring. To do this prune back to (just above) a plump pair of buds.
- Group 3: This group contains late flowering species and hybrids. Prune this group back hard (approximately 30cm (12″) from ground level, cutting just above an old leaf joint) in late winter/early spring.
- Shade the roots: It is essential for the roots to remain cool and moist so protect the root area with a heavy mulch or the shade of low growing plants.
- Do not till or dig near Clematis: Clematis resent root disturbance, so extreme care must be exercised when working around the plant.
- Use natural fertilizers: If you have taken the time to establish a healthy soil and are top dressing yearly with compost, then you will need very little in the way of additional fertilizers. For me I apply a light feed of an organic granular fertilizer in early spring (when the plants begin actively growing). Then in early summer I may apply a blend of liquid seaweed and fish emulsion either as a foliar spray or directly to the soil.
The following (and previous) photos of naturally grown Clematis plants provides living proof that big, beautiful blooms on healthy vibrant Clematis plants is possible without the use of chemicals. So put away your synthetic fertilizers, chemical fungicides and pesticides and join the growing trend toward healthier and environmentally friendlier gardening practices.

Photo by: Kimberley Pacholko
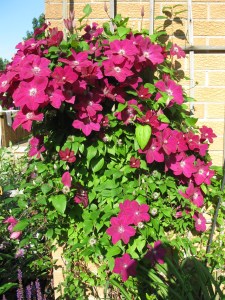
Photo by: Kimberley Pacholko
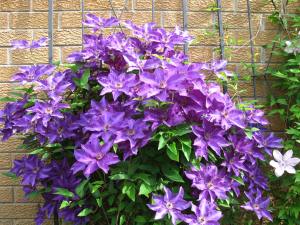
Photo by: Kimberley Pacholko
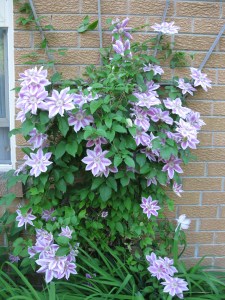
Photo by: Kimberley Pacholko

Photo by Kimberley Pacholko
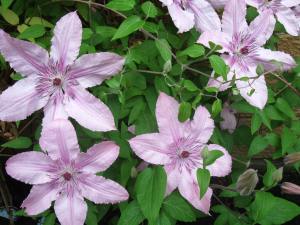
Photo by Kimberely Pacholko
All Rights Reserved
